Online Banking FAQs
The Online Banking Home Page helps you do your everyday money management tasks quickly and easily all in one place. In fact, we’ve brought together the tools needed to perform your most common daily tasks without ever leaving the page. You can easily:
- Check all of your account balances at once
- Take a quick peek at your most recent transactions
- Make a one-time transfer between your accounts
- Make a loan payment within My Accounts
- Schedule a one-time bill payment
So instead of switching between Account Summary, Account History, Bill Pay, Transfer Funds and other pages, you can take action right there on one page to complete several basic functions. We hope you will think of it as your money management control panel.
NOTE: If you do not have any accounts set up in online banking yet, the page will just display the message, “You do not currently have any accounts.”
The Online Banking Home Page contains task-specific areas that are usually found individually on several different pages within Internet Banking: Account Summary, Account History, Bill Pay and Transfer Funds. NOTE: If you do not have any accounts set up in online banking yet, the page will just display the message, “You do not currently have any accounts.”
My Accounts
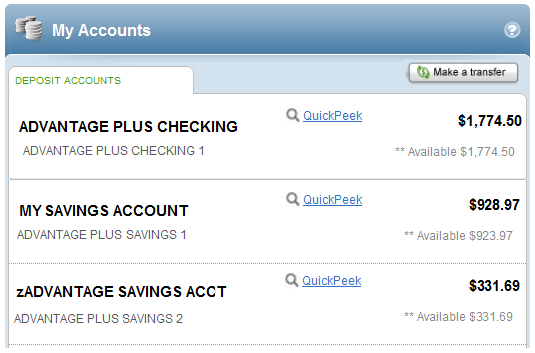
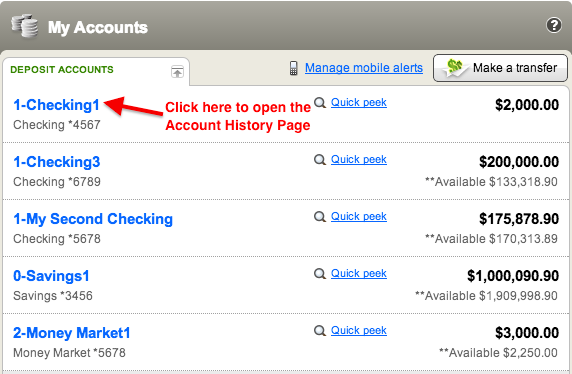
This is where you can see all of your accounts and balances in a glance without having to scroll. In the upper-right portion of My Accounts you will find the Make a transfer icon and link that enables you to make a one-time funds transfer between your accounts and much more. To view the most recent activity for any account, click the Quick Peek link. Clicking Quick Peek opens a new window that shows the most recent transactions or payment activity for the account along with links to Make a Transfer and Go to account history.

Make a transfer
Just select the Make a transfer button to make a one-time transfer between your accounts. You may also be able to transfer funds to make a loan payment, if that option is available. If there are any restrictions on the number of transfers allowed per month or any transfer fees applied, it will be indicated in a message displayed below the To or From field (or both).
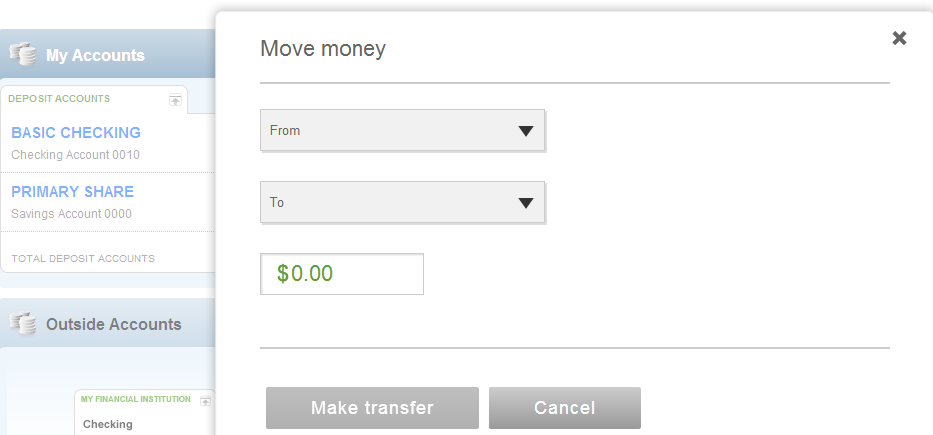
Selecting the Make a transfer button opens the Move Money window above the My Accounts list. Just enter the amount, select the transfer To and From accounts, then click the Transfer button and confirm the transfer details and you’re done. Transactions now post quickly when you complete a transfer. This means that we will automatically refresh the page (to get the new account balances) when you close the transfers success window.
NOTE: If you are making a loan payment, additional fields may be available to enter the required information. If available, additional transfer options may be found within the main Internet Banking pages.
Make a Payment
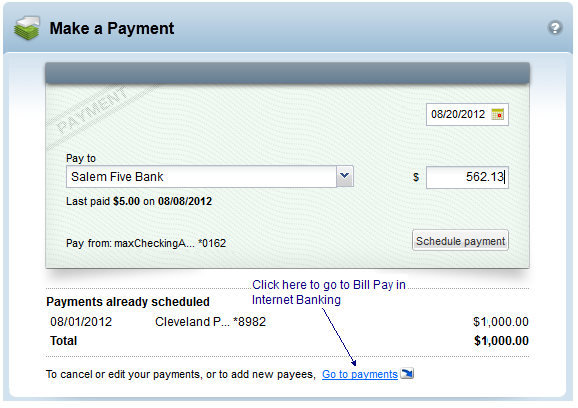
If you are already using Bill Pay in Internet Banking, you can schedule a one-time payment here. First select a payee from the drop-down field, then select the payment date using the calendar tool and enter the amount. Then click the Schedule payment button to schedule the payment. Schedule payments that haven’t yet been paid are also displayed here.
If you are not yet a Bill Pay user, the Make a Payment section will display a message about paying bills online. Just click the Go to payments link below the message to go to the Bill Pay enrollment page.

You can use your standard menu and submenu selections to navigate around Internet Banking like you do now. However, each section of the Online Banking Home Page has a link that will take you to other pages within Internet Banking that may help you do things that are not currently available on the new page.
- In the My Accounts section you will find a Quick Peek link to the right of each account name. Clicking the link opens a new window listing the most recent transactions. At the bottom of the window you will find a Go to account history link, which, when selected opens the New Account History Page for that account.

- At the bottom of the Make a Payment section you will find a go to payments link. Clicking this link opens the main Bill Pay page within Internet Banking. This is where you can add, edit and delete payees, set up recurring payments and other Bill Pay-related tasks.
Yes you can copy data from the transaction list and paste it into standard spreadsheets like Excel. Just highlight and copy the data you want (e.g., date, description or amount) from Quick Peek and paste it into a row of the spreadsheet.
Yes, you can use Control + F to do a simple browser search for an amount, date, payee name, etc. within Quick Peek. For example, just open the browser search field (Control + F) enter the payee name and click the Next button.
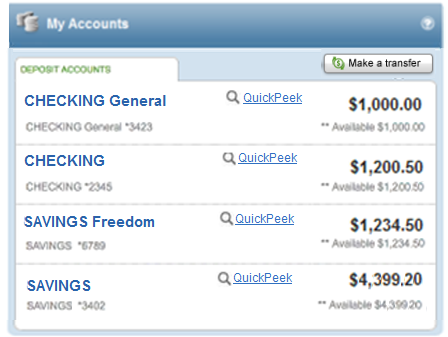
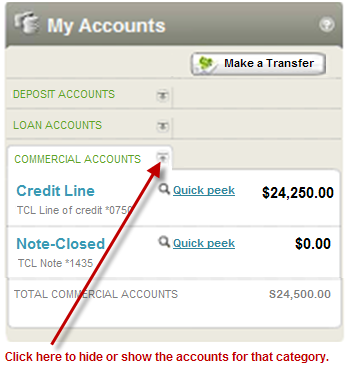
The My Accounts section in the upper left area has all of your accounts categorized by type (Deposit, Savings, Loans, etc.) with the current balance and available balance for each account. Within each category group the accounts are listed in alphabetical order by name – either the original account name or the account nickname that you assigned.
Your first Deposit account is displayed at the top of the list and shows the balance and available balance. The Total Accounts value is displayed at the bottom of each account section.
If available with your online services, you will be able to see the maturity date of your CD or Certificate Account in the account bar without having to access the account details. If the maturity date is available, it is displayed as Matures on MM/DD/YYYY.
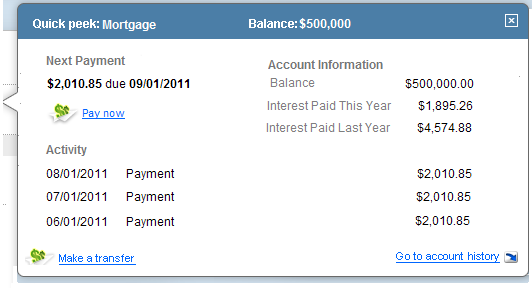
Clicking Quick Peek opens a new window that shows the balance and available balance along with the most recent transactions or payment activity for that account. High transaction volume accounts (like Checking) will show 5 days of account activity. Low volume accounts (like loans) will show 30 days of account activity. You will also find helpful links to Make a Transfer and Go to account history at the bottom of the window.
Just click the X button on the top right or anywhere outside of the window to close it. Clicking the account name or the Go to account history link opens the Account History Page for that account.

For all loan accounts you will see the balance, next payment amount, a Pay now link (to make the loan payment), interest paid for the current and previous years, recent payments made, and a link to the account history page. Clicking the Pay now link will open the Move money window so you can complete the payment.
It couldn’t be easier. Just click on the arrow icon that’s located to the right of the account category name to hide all of the accounts for that category. Simply click on the arrow icon again to redisplay the accounts.
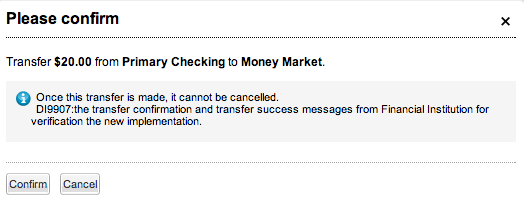
In the upper right portion of the My Accounts section you will see the Make a Transfer button. Clicking the button opens the Move Money window. Select the From and To accounts, enter the transfer amount, then click the Transfer button. If it applies, the number of transfers available and number of transfers used for the month will be displayed below the account field.

When you click the Transfer button you will get a message asking you to confirm the funds transfer, as seen in the example below.
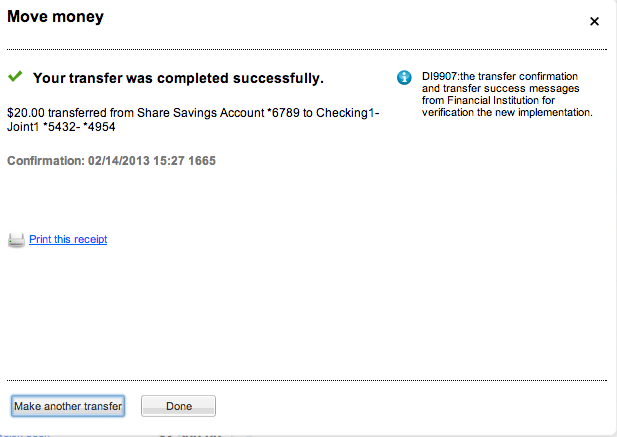
When you click the Make Transfer button a transfer complete window will display with all of the relevant transfer details and the option to Make another transfer or Print the transfer details. Transactions will post immediately when you complete the transfer.
This means that we will automatically refresh the page (to get new account balances) when you close the transfers success window shown below. NOTE: If an issue should occur during the transfer process, an error message will instruct you what to do next.
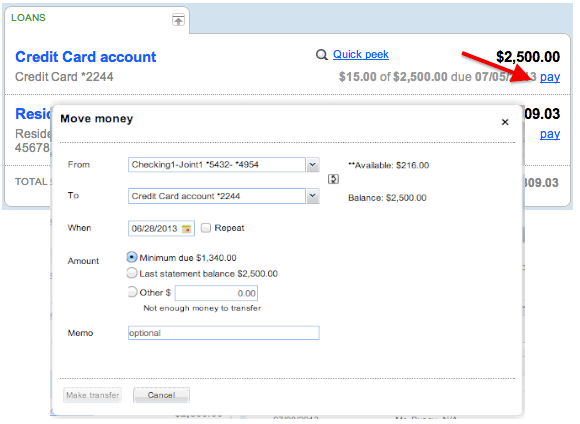
To make a loan payment using Move Money:
- Click the Pay link to open the Move Money window
- Select the From account from the drop-down list (the Available dollar amount will be displayed)
- Select the To account from the drop-down list (the Balance amount will be displayed)
- Review the Amount to be paid
- Click the Transfer button and review the payment details
- Click the Make Transfer button to complete the payment and display the payment details
- Click Make another transfer to make another transfer or payment, click Print confirmation to print out the payment details, or click Close to close the Move Money window
Transfers made on the Online Banking Home Page will display quickly in the My Accounts list and the Account History Page transactions list if it’s supported. This means that we will automatically refresh the page (to get new account balances) once a user closes the transfers success window.
At the top of the right column is the Make a Payment section. It looks a bit like a check and can be easily used to schedule a new payment.
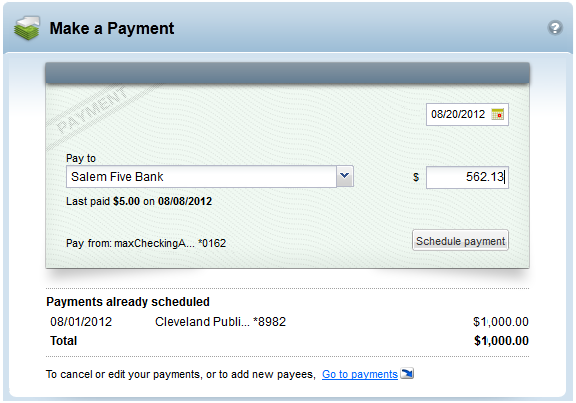
Use the following steps to schedule a new payment:
- Click the drop-down button on the Pay to field to see all of the payees. (i.e., all of the payees you already have set up in Bill Pay)
- Click a name on the list to select it. (If a payment has been made to that payee in the last 90 days, it will appear below the payee name)
- Click the date field and select the payment date from the calendar. When the calendar closes the date will be automatically entered into the field. (Dates in the past, weekends and bank holidays cannot be selected)
- Enter a dollar amount in the $ amount field and click the Schedule payment button
- Review the confirmation message to make sure everything is correct
- Click the Yes button to complete the payment
- A success message and the scheduled payment will appear in the Payments already scheduled list. (The Payments already scheduled list displays all payments that have been scheduled but have not yet been sent)
NOTE: If for any reason the payment cannot be scheduled, an error message will display and tell you what to do next.
If you are not yet set up for bill pay, the Make a Payment task area will display a message encouraging you to start paying your bills online. Clicking the Go to Payments link will take you to the Bill Pay start page.
We are experiencing a temporary communication issue with the main Bill Payment system meaning it does not recognize payments made through Make a Payment on the Online Banking Home Page. You may have even received an email reminder to pay the same eBill that you just paid using Make a Payment. Please go to the main Bill Pay system and file that eBill to resolve the issue.
Just click the account name link that you want to open the Account History Page. The page will open with transaction details for your default date range. Or you can click on the Go to account history link in the Quick Peek window to directly access the Account History Page.
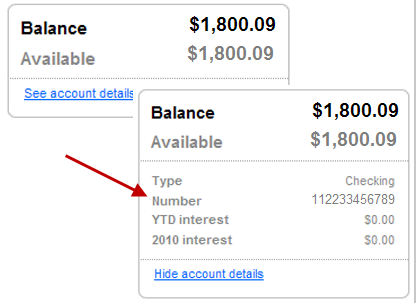
If we do not mask account numbers, you can go to the account you want and click the account name link to open the Account History Page. Click the See account details link in the account summary window in the upper right-hand part of the screen. If it’s available and not masked, your full account number will be listed with other relevant account details.
When you are finished just click the Hide account details link to collapse the extra information. (NOTE: Your account number can also be found at the bottom of a physical check. It’s the last 7-10 numbers on the right side.)
First go to the My Accounts area and find the account you’re looking for. Click the account name link for that account to open the Account History Page. The check will display as a link, typically with the check number. Simply click the link to view images of the front and back of the check. Click the Close button at the bottom of the window when you are finished.
First go to the My Accounts area and find the account you’re looking for. Click the account name link for that account to open the Account History Page.
Print Transactions: Make sure the date range is what you want (e.g., 30 days) or select a different date range using the Change drop-down list. Click the Print icon or link to open a separate window showing the transactions in a printer friendly format. Select a printer, if needed, and click the Print button to send the transaction list to the printer.
Print Check Images: In the Account History Page, open the account that you want and then click the check link that you want to print. With the check images displayed, click the Print icon or link. Select a printer, if needed, then click the Print button to send the check images to the printer.
If available, it’s very easy to do:
- Click My Settings at the top navigation within Online Banking.
- Click the Rename & Hide your accounts link (the name of the link may vary) in the Other settings section.
- Find the account you want and type the new name in the Rename Account field.
- Repeat this for each account that you want to change.
- When finished, click the Done button.
- You should see your account nicknames the next time you log in to Online Banking.
NOTE: These changes can take up to five minutes or more to take effect.
Your account categories have been set up to automatically display in a certain order: Checking, Savings, Money Market, Certificate of Deposit or Certificate Account, Mortgage Loans, etc. However, if you happen to have multiple accounts within a given category (e.g., two or more savings accounts), you can change the display order of those accounts.
The account names or nicknames within a category appear in alphabetical order, so you can change the account nicknames so the accounts display in the order you want, e.g., My Savings Account will display before Advantage Savings Acct because of the added ™.